
Over the last few years as the pandemic has worn on, I’ve become increasingly addicted to landscape photography and discovering the joys of waterfalls! In this post I thought I’d share my experiences of finding and photographing waterfalls in different contexts.
The last two summers in eastern Australia have been unseasonably wet, fueled by La Nina weather cycles. This was a welcome change from the ‘Black Summer’ of 2019/2020 and the catastrophic bushfires that decimated much of eastern Australia. It has also proven a boon for waterfall photography! After decades of drought, the country’s waterfalls have come back to life.
Being based on the northern beaches of Sydney, I’ve been keen to find waterfalls in my local area, as well as travel a bit further afield visiting well known falls in the Blue Mountains and Central Coast. This usually requires a bit of research. Beyond noting waterfalls others have shot on social media, I’ve been using Google Maps to tag potential locations and apps like AllTrails to navigate the sometimes lengthy and rough bushwalks needed to get to the more unknown ones! I also create online notes about different locations, navigation tips, best seasons and times of day in Evernote, so I can source these later out in the field.

Planning a waterfall trip also involves looking for a suitable weather window. Some smaller waterfalls only appear at their best after heavy rainfall, while larger ones can be at top flow a day or more after rain. Here I use weather apps like Windy, to get multiple day rain and cloud forecasts by area and Bureau of Meteorology rainfall data in planning a waterfall photoshoot.


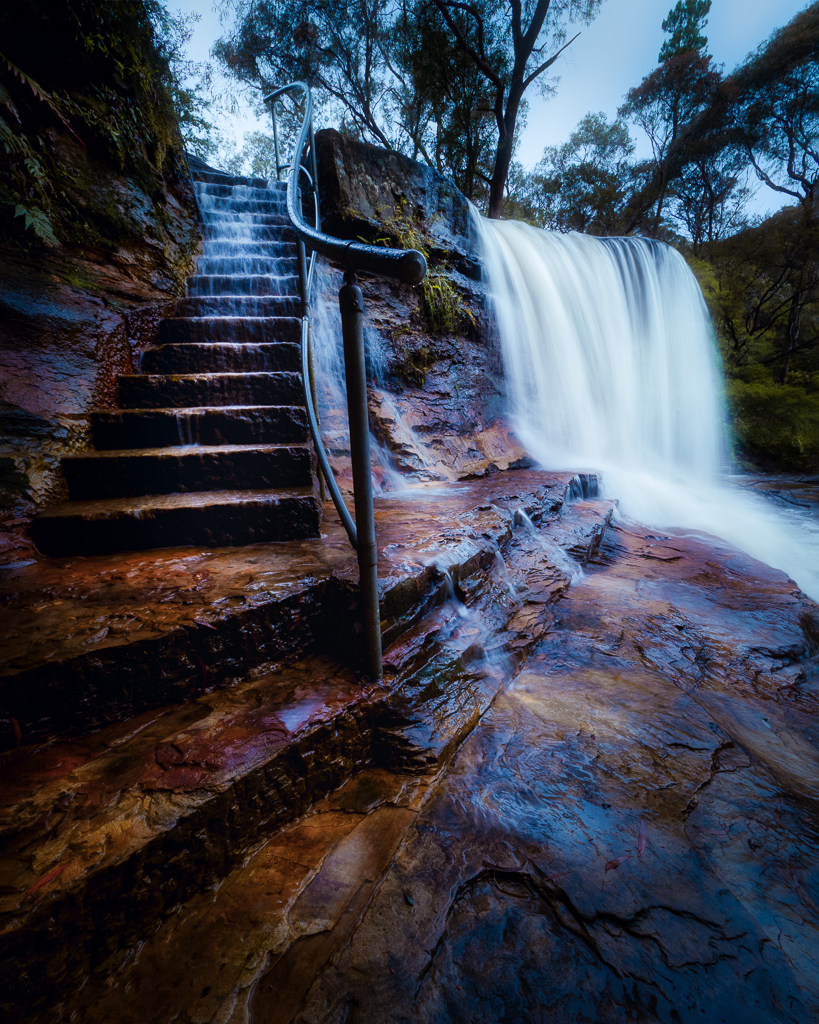
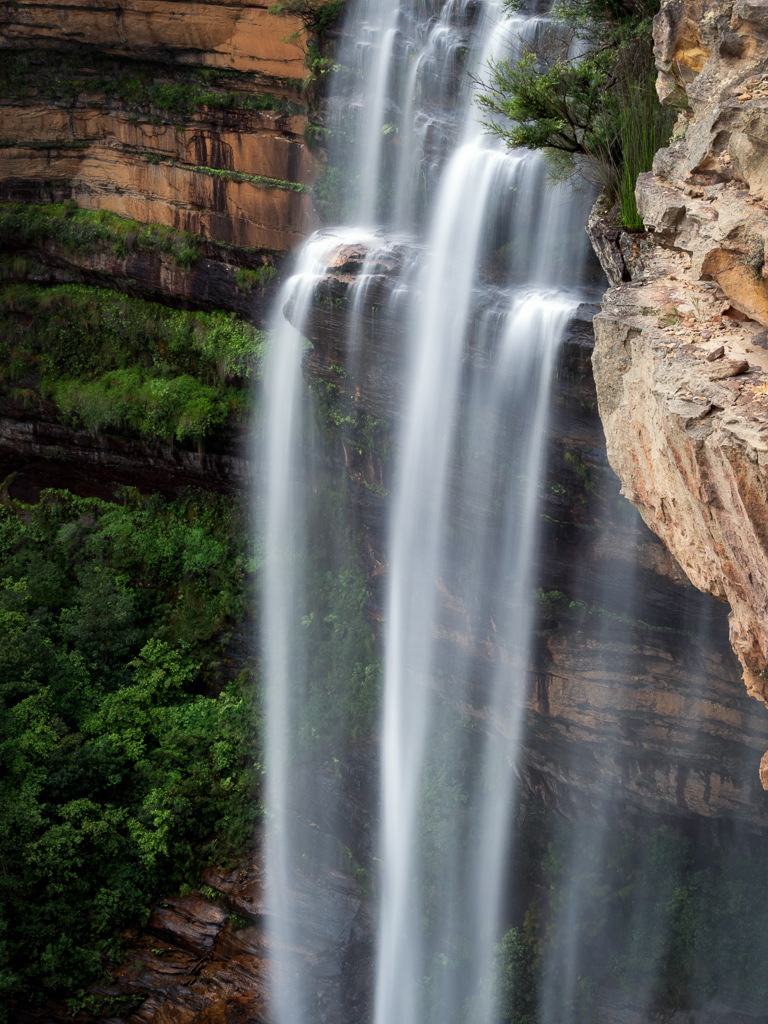
Once I’ve worked out a day and time to target a waterfall, much of the thrill is actually finding it! Typically, there is a bit of bushwalking involved and sometimes this can be quite an arduous trek. In the Blue Mountains, I once did a long 5 hour hike from Wentworth Falls down into the Jamieson Valley and then up through the Valley of the Waters, before circling back to my original starting point – the Fitbit said 25,000 steps and the legs were tired after such a vertical climb!
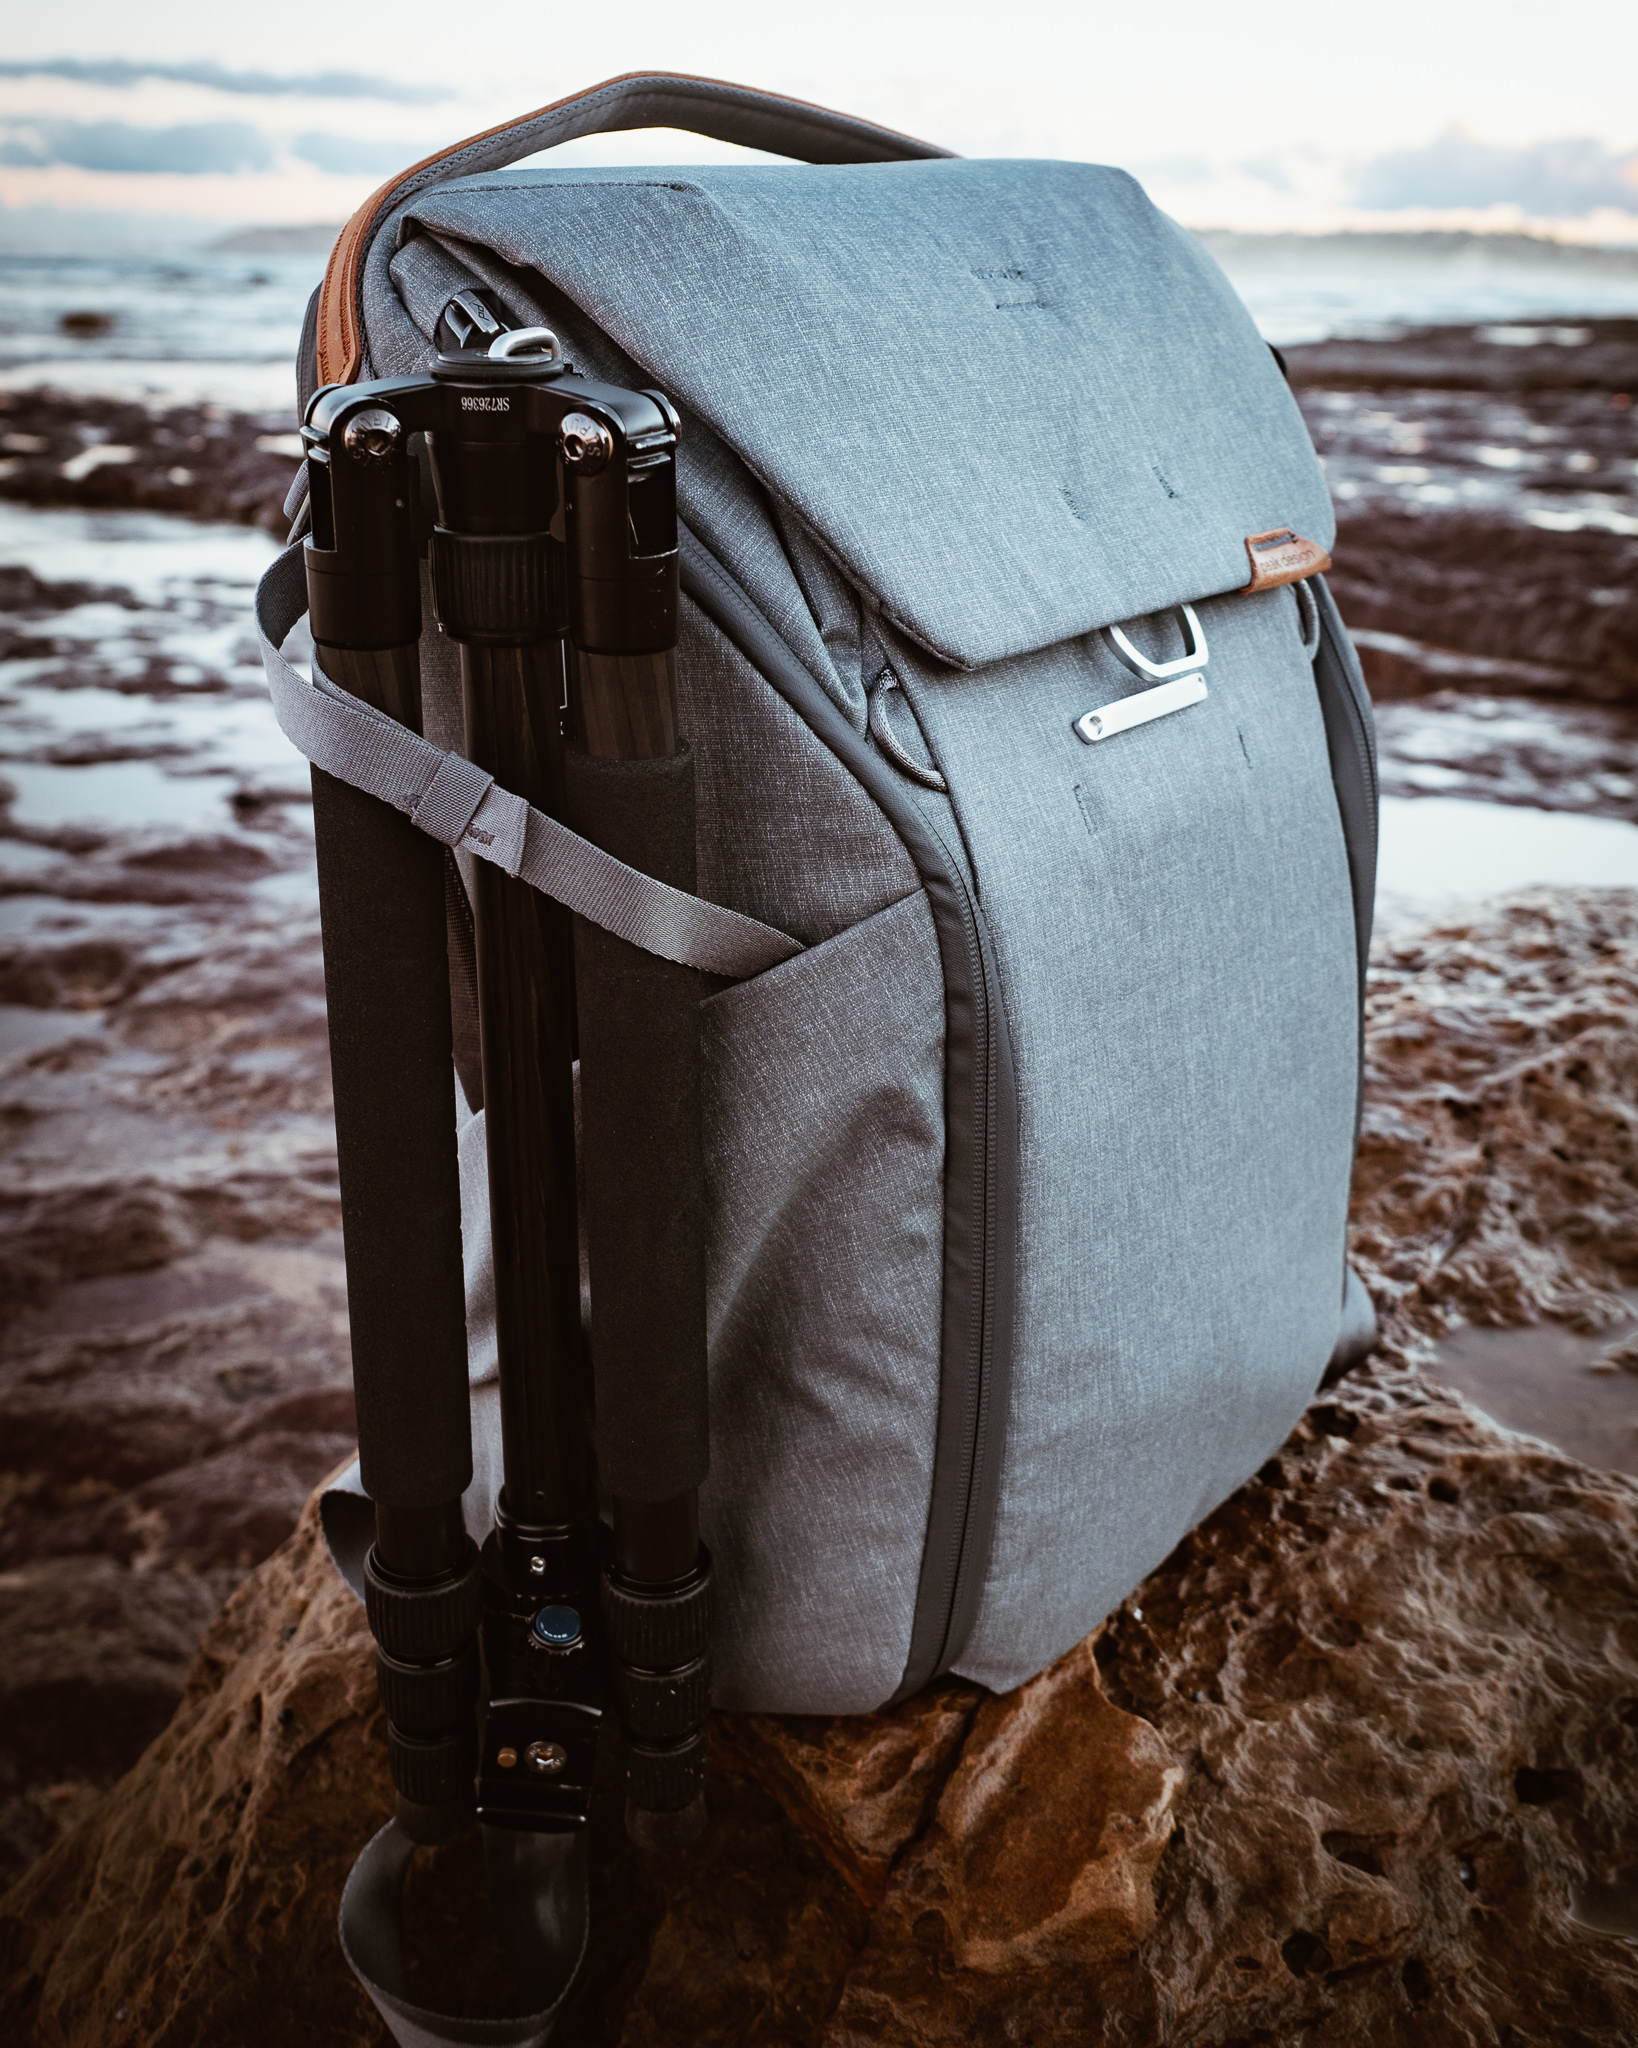
For these treks you need good hiking shoes, wet weather jackets and outdoor clothing. You also don’t want to be lugging masses of heavy camera gear! Through trial and error, I’ve now refined my bushwalking photography kit to a pretty user-friendly set-up. For shoes I’ve ditched heavy hiking boots and go with Altra Lone Peak trail runners. I pack a Gore-Tex shell which can be folded up small when not needed. I shoot with an Olympus M43 kit which produce stellar images at close to half the weight of the ‘full-frame’ camera set-ups and use a super-light Sirui travel tripod. This is all kept in my Peak Design Everyday Backpack. This much smaller photo kit is quite the envy of the other photographers I run into on these big bush-bashes – they often can’t believe I pack two camera bodies, three zoom lens, plus filters, lunch, water and tripod in such a small carry!
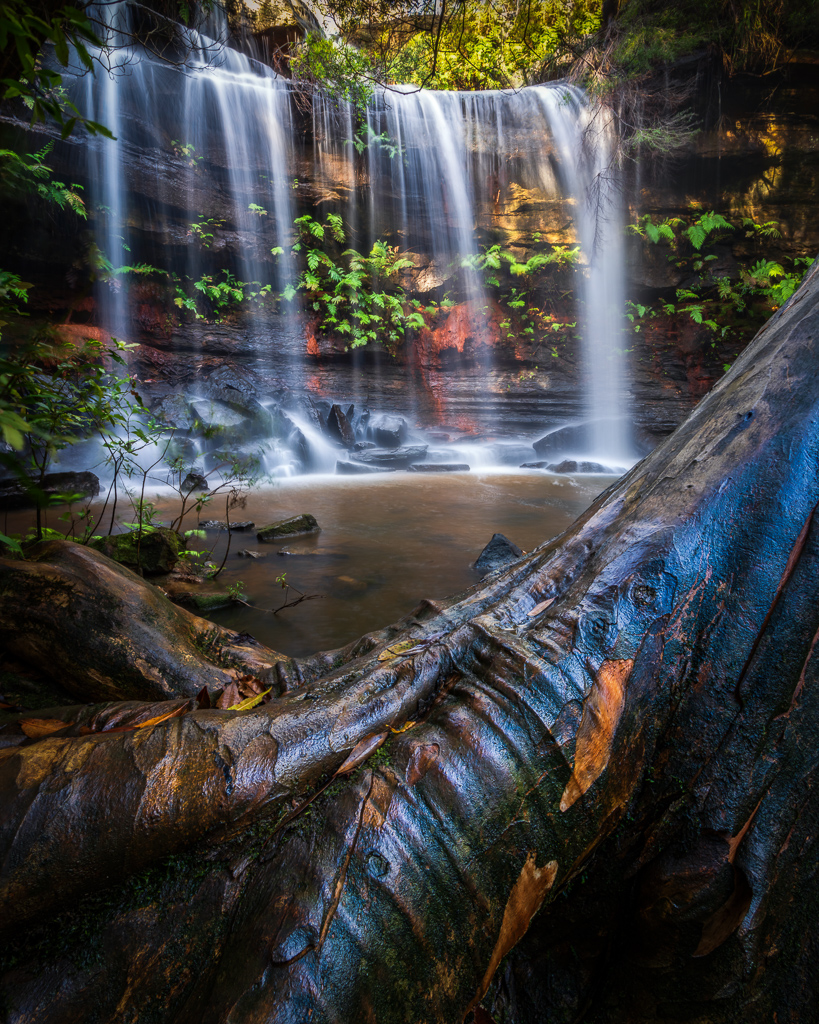
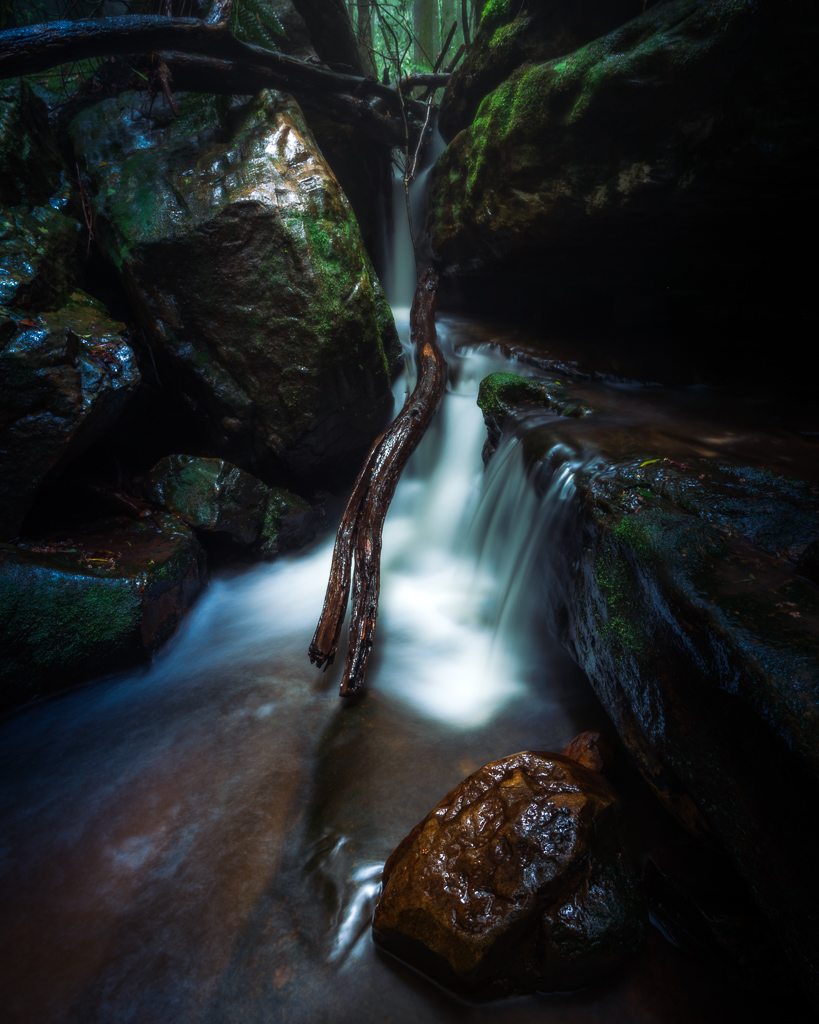
The big thrill in visiting a falls is the sound in the distance as you approach them but have yet to actually see them. The sound of falling water carries a surprisingly long distance in the bush and is often amplified by the steep valleys and gorges these falls carve out. There’s nothing like the roar of a waterfall after a big rain and knowing you’re getting close! Once the falls is finally revealed, I find the best thing is to just pause and soak in the vista for a good few minutes. It sometimes takes an hour or more to get to some of these locations and its best to just kick back and let the vision of the falls soak in. I typically time my waterfall hunts for mid-week to avoid crowds, particularly for the more well-known waterfalls. There’s something about being out in nature away from people that for me adds to the magic of the waterfall.
It’s then just an issue of finding compositions that work for you on the day with the ambient lighting. I’ve got into the habit now of using my iPhone 12 in wide-angle mode to scout out possible compositions before pulling out the cameras. I also try to use the camera handheld initially so I can be free to experiment with possible compositions.

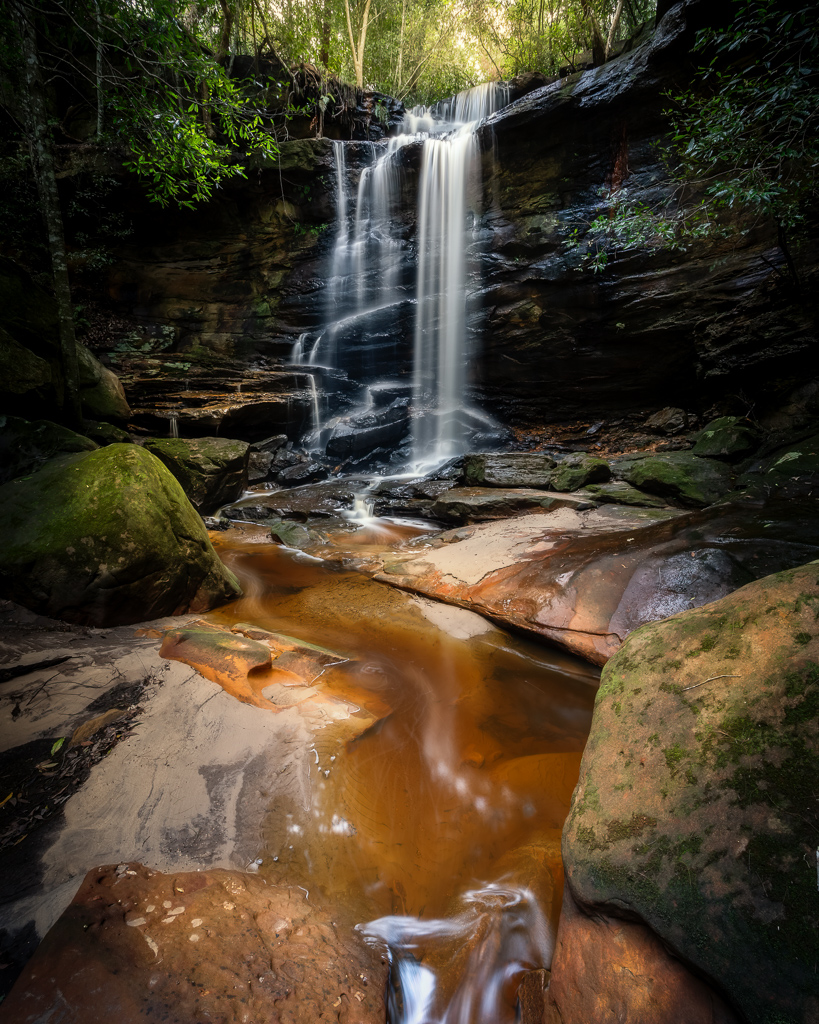


In shooting, I’m often biased towards my 7-14PRO M.Zuiko wide-angle lens. This is the ‘full frame’ equivalent of 14-28mm and provides some amazing compositions that allow you to draw the viewer’s eye into the frame with foreground, midground and background details. I’m often shooting at small apertures to maximise depth of field, and with the new OM-1 camera I’m using combinations of built-in ND, hand-held high res (50MP) and tripod high-res (80MP) shots. These computational additions allow me to avoid using regular ND filters as much and facilitate experimenting with different exposures, water-flow, and much larger image sizes. Having said that, the regular 20MP images out of the OM-1 are amazing re detail and resolution. I rarely go above base 200 ISO – so noise is never really an issue. Exposure times really depend on the speed and amount of water flow and it’s best to experiment. I find around a third to a half a second can work well, but sometimes a longer exposure will produce a milkier water flow effect that can be quite appealing.
After a long afternoon of shooting a waterfall from as many compositions as I can find, it’s usually time to sit down and have a snack and rehydrate before the long hike back out. I’ll write a future post about my post-processing workflow for waterfall images, but if you haven’t tried waterfall photography, it’s well worth a try. Beyond the famous waterfalls that are a staple of Instagram posts, there are a surprising number of smaller ‘unknown’ falls that exist across the suburban area and which reveal themselves after some good rain. There’s quite a bit of satisfaction to be had, hunting down these lesser-known falls and rediscovering what is in your own backyard!
If you want to see more of my photos in higher resolution, check out my landscape catalog on my SmugMug site.

